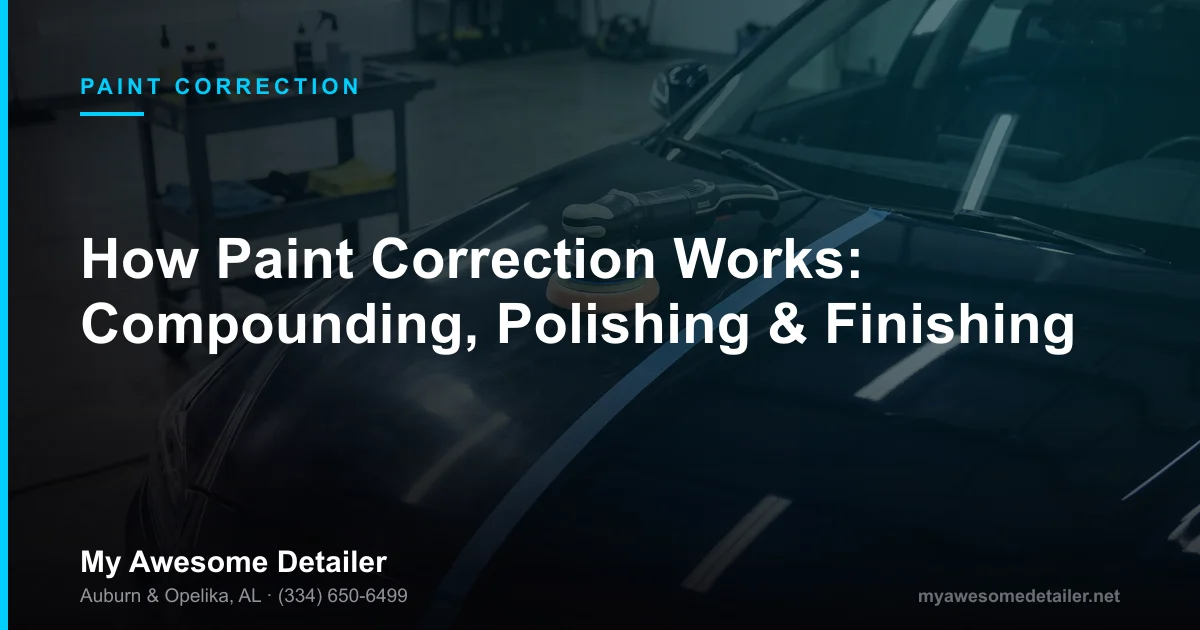
Quick answer: Paint correction works by using a machine polisher, a foam or microfiber pad, and an abrasive compound or polish to remove a microscopically thin layer of clear coat until the bottom of the swirls and light scratches is gone. Compounding is the heavy cutting stage that removes the defects. Polishing refines the haze compounding leaves behind. Finishing brings out the final gloss and clarity. A one-step job polishes only; a multi-stage job compounds, then polishes, then sometimes finishes. Done right, it removes only a few microns of clear coat, and it should always come before a ceramic coating.
Most people have seen a before-and-after photo of paint correction. One half of a hood is gray with swirls, the other half looks like a black mirror. What those photos don't show is what actually happened between the two halves: which machine, which pad, which liquid, how many passes, and why the detailer stopped where they did.
That's what this guide covers. At My Awesome Detailer LLC, 2709 Frederick Road in Opelika, paint correction is a big part of what we do for drivers from Auburn, Opelika, and the rest of Lee County, and it's the step under every ceramic coating we install. Below we'll walk through how paint correction works mechanically, what compounding, polishing, and finishing each do, how the machine and pad choices change the result, why it's all measured in microns, and how single-stage and multi-stage correction compare. If you're not sure your car needs it yet, start with our guide to the signs your car needs paint correction. If you already know and want numbers, our paint correction cost guide for Auburn breaks down pricing.
How paint correction works: the short version
Paint correction is controlled leveling. It doesn't fill scratches, hide them, or coat over them. It lowers the surrounding clear coat until it's level with the bottom of the defect, so the defect simply isn't there anymore.
Think of a swirl mark as a tiny valley cut into a flat field. Wax and glaze try to fill the valley so you can't see it. That works for a few weeks, and then the filler washes out and the valley is back. Paint correction takes the opposite approach. It shaves the field down, a tiny bit at a time, until the field and the bottom of the valley are at the same height. Once the surface is flat again, light reflects straight back to your eye, and you see gloss, depth, and a sharp reflection instead of haze.
Everything else in the process, from the machine to the pad to the liquid to the number of stages, exists to do that leveling as precisely as possible while removing as little clear coat as necessary.
Why the clear coat is the whole story
Modern car paint is built in layers. There's an e-coat and primer on the metal, a thin base coat that carries the color, and a clear coat on top. The clear coat is what gives the paint its shine, and it's what takes all the abuse: wash mitts, automatic car wash brushes, dry towels, pollen, bird droppings, and the Alabama sun.
Almost every defect people want corrected lives in that clear coat:
- Swirl marks from automatic washes, dirty mitts, and wiping a dusty car
- Light scratches that your fingernail doesn't catch
- Haze and dullness from thousands of fine scratches scattering light
- Water spot etching from hard water or sprinklers drying on hot panels
- Holograms and buffer trails left by a rushed or poorly finished past polish
- Light oxidation on older or sun-baked paint
Because these defects sit in the clear coat, they can be leveled out of the clear coat. Damage that has gone through the clear coat into the color or primer is a different problem. Polishing can make it less visible, but it can't put paint back. For those cases, see our guide to scratch repair, paint correction, and touch-up.
Why paint correction is measured in microns
Detailers talk about paint in microns because the numbers are that small. A micron is one-thousandth of a millimeter. A human hair is roughly 50 to 100 microns thick, depending on the person.
Factory clear coat on most cars is often somewhere in the range of about 30 to 50 microns thick, and it varies by manufacturer, by model, and even by panel. Total paint thickness, including primer and color, is greater, but the clear coat is the part you can safely work in. That's not a lot of material. It's thinner than a sheet of printer paper.
A typical light polish removes only a few microns. A heavier compounding step removes more. That's why professional correction is planned around a simple goal: remove the least amount of clear coat that gets the result you want. Every pass takes something you can't get back, so a good detailer doesn't chase every last defect on a thin panel just because it's technically possible.
How we measure before we polish
Professional correction starts with a paint depth gauge. The gauge reads total paint thickness at points around each panel. It doesn't directly measure clear coat alone on most vehicles, but it tells us a lot:
- Unusually low readings can mean a panel has been heavily polished before, or that the factory paint is thin in that spot. We go lighter there.
- Unusually high readings often mean a panel has been repainted. Body shop paint can behave differently under the pad, so we test it separately.
- Edges, body lines, and corners naturally carry less paint, so we keep the machine off sharp edges or tape them.
Measuring first is what separates correction from guesswork. It's also why we never quote "full correction" on a car we haven't looked at under proper lighting.
Compounding vs. polishing vs. finishing: the three stages
The terms get used loosely, so here's what each stage actually means. All three use the same basic tools, a machine, a pad, and an abrasive liquid. What changes is how aggressive the combination is and what job it's doing.
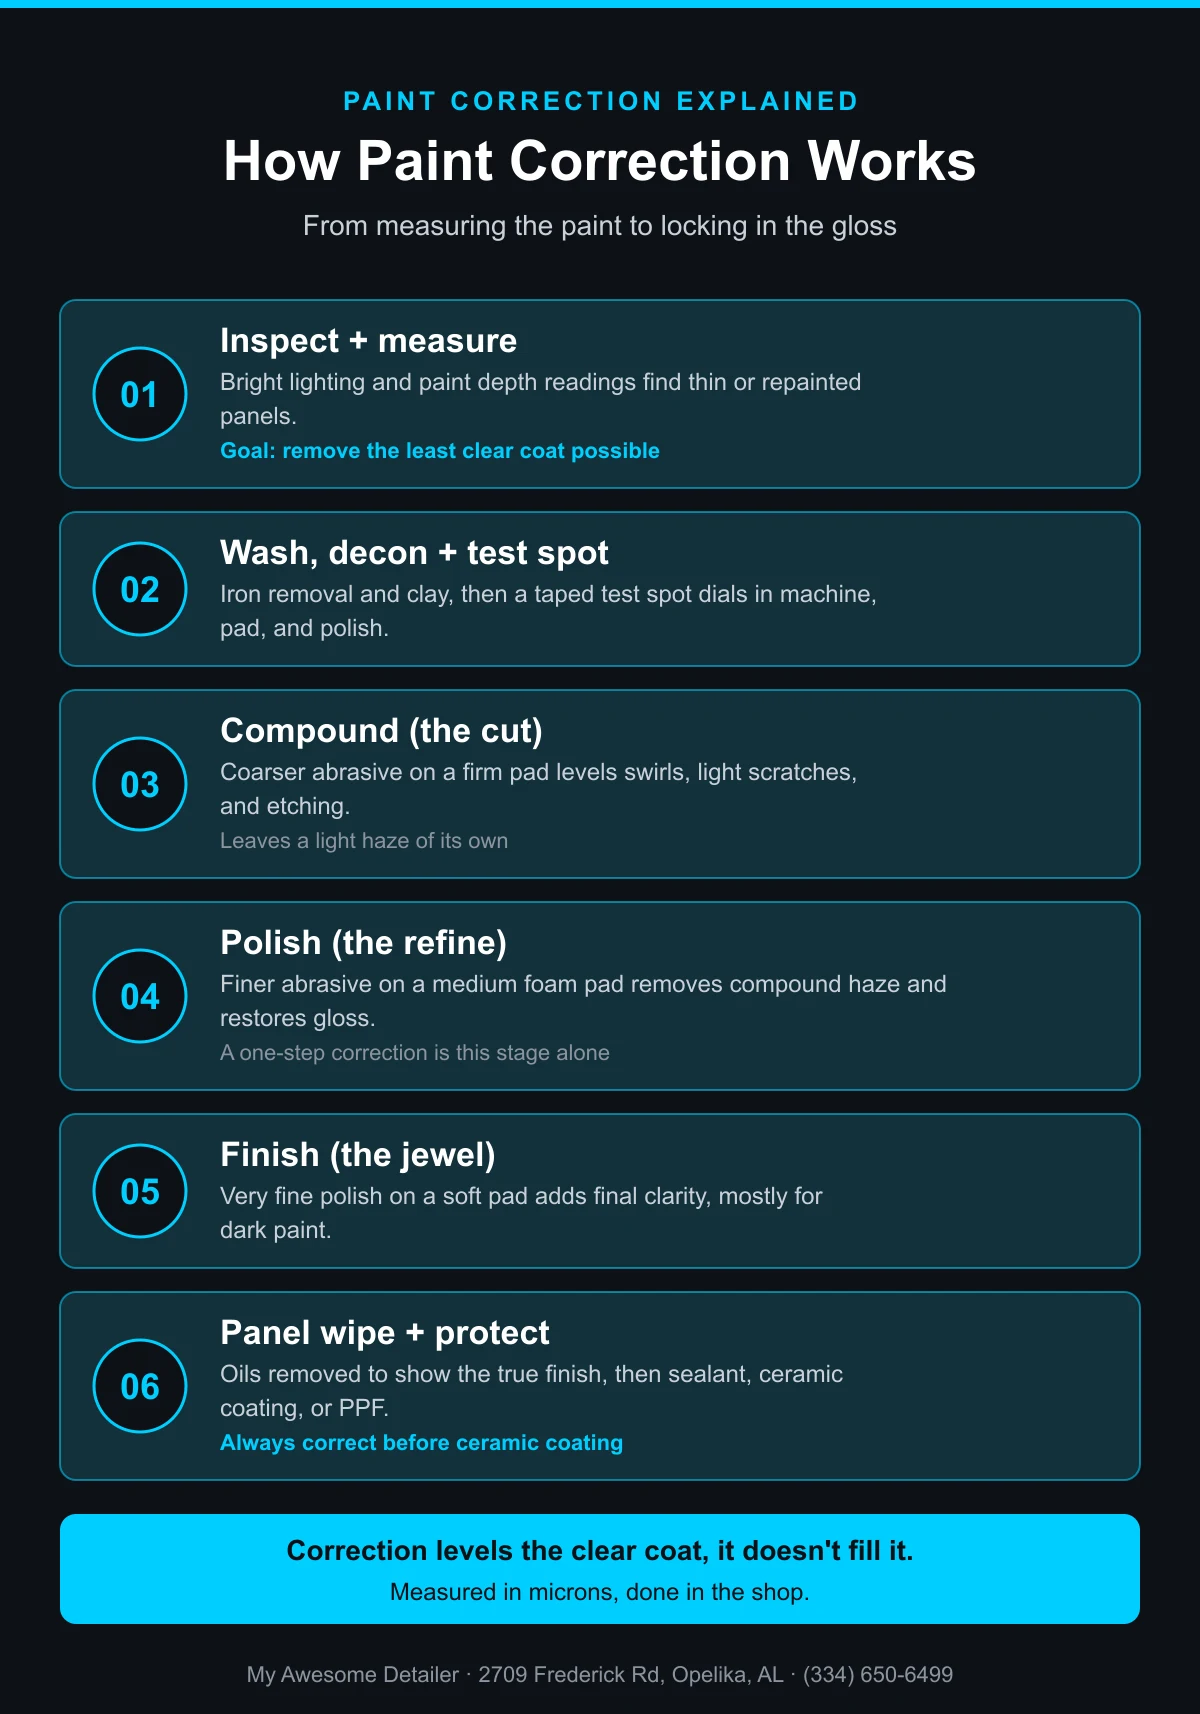
Stage 1: Compounding (the cut)
Compounding is the heavy lifting. A compound contains larger or more aggressive abrasives, and it's usually paired with a firmer cutting pad, such as a microfiber pad or a firm foam cutting pad. Its job is to remove defects: swirls, light scratches, water spot etching, and oxidation. It does this by leveling the clear coat faster than a polish can.
The tradeoff is that compounding leaves its own fine marks behind. After a compounding pass, the paint is usually much clearer than before, but under a strong light you'll often see a light haze or micro-marring from the cut itself. That's normal. The compound did its job of removing the deep defects, and now the surface needs refining.
Compounding is where most of the clear coat removal happens, so it's where measuring and test spots matter most.
Stage 2: Polishing (the refine)
Polishing removes the haze compounding leaves behind. A polish uses finer abrasives, typically with a medium foam polishing pad. It levels the much smaller marks left by the compound, so the surface goes from "clear but slightly hazy" to "clear and glossy."
On a car with only light swirls, polishing can also be the only step. That's what a one-step correction is: a single polish-and-pad combination chosen to remove as many defects as possible while finishing down well enough to look great. Modern one-step products are good at this, which is why a one-step is the most common correction we do.
Stage 3: Finishing (the jewel)
Finishing is the final refinement. A very fine finishing polish on a soft foam pad brings out the last bit of clarity and gloss. It's most noticeable on black and other dark colors, where any remaining micro-haze shows up in direct sun. Some detailers call this step "jeweling."
Not every car needs a dedicated finishing step. Many paints finish down beautifully after the polishing stage. Finishing is usually reserved for show cars, very dark paint, or soft clear coats that tend to haze.
The three stages side by side
| Stage | Typical pad | Abrasive | Main job | Clear coat removed |
|---|---|---|---|---|
| Compounding | Microfiber or firm foam cutting pad | Coarse compound | Removes swirls, light scratches, etching, oxidation | Most of the total (still small) |
| Polishing | Medium foam polishing pad | Medium to fine polish | Removes compound haze, restores gloss; can be the only step on light defects | Less than compounding |
| Finishing | Soft foam finishing pad | Very fine finishing polish | Maximum clarity and depth, especially on dark paint | Very little |
The pattern is simple: each stage is less aggressive than the one before it, and each removes the marks the previous stage left. You start with the cut you need and work down to the finish you want.
Machines and pads: how the tools change the result
The liquid gets most of the attention, but the machine and pad matter just as much. The same polish can cut hard or finish soft depending on what it's paired with.
Dual-action (DA) polishers
A dual-action polisher spins the pad and also moves it in an off-center orbit. That random motion spreads heat and cutting action around, which makes it more forgiving. A DA is less likely to burn through an edge or leave holograms, and with modern pads and compounds it can do serious correction. For most daily drivers, most of the work can be done with a DA.
Rotary polishers
A rotary polisher spins the pad on a single fixed axis. It builds more heat and cuts faster, which makes it very effective on hard clear coats and deep defects. It's also less forgiving. A rotary in inexperienced hands is how holograms, buffer trails, and burned edges happen. Many of the "my car looks worse after a detail" cases we see trace back to a rushed rotary job with no finishing step.
Forced-rotation and long-throw machines
There are machines in between, too. Long-throw DA polishers use a bigger orbit for more correction per pass, while forced-rotation polishers combine an orbit with a geared spin for more cutting power. The point isn't that one machine is best. It's that the detailer chooses the machine that fits the paint and the defect.
Pads: foam, microfiber, and wool
- Wool pads are the most aggressive. They're mostly used with rotary machines for heavy cutting on hard paint.
- Microfiber pads cut aggressively on a DA and are a common choice for compounding.
- Foam pads come in cutting, polishing, and finishing densities. Firmer foam cuts more. Softer foam finishes better.
- Pad size matters too. Larger pads cover flat panels faster. Smaller pads reach pillars, bumpers, mirrors, and tight areas safely.
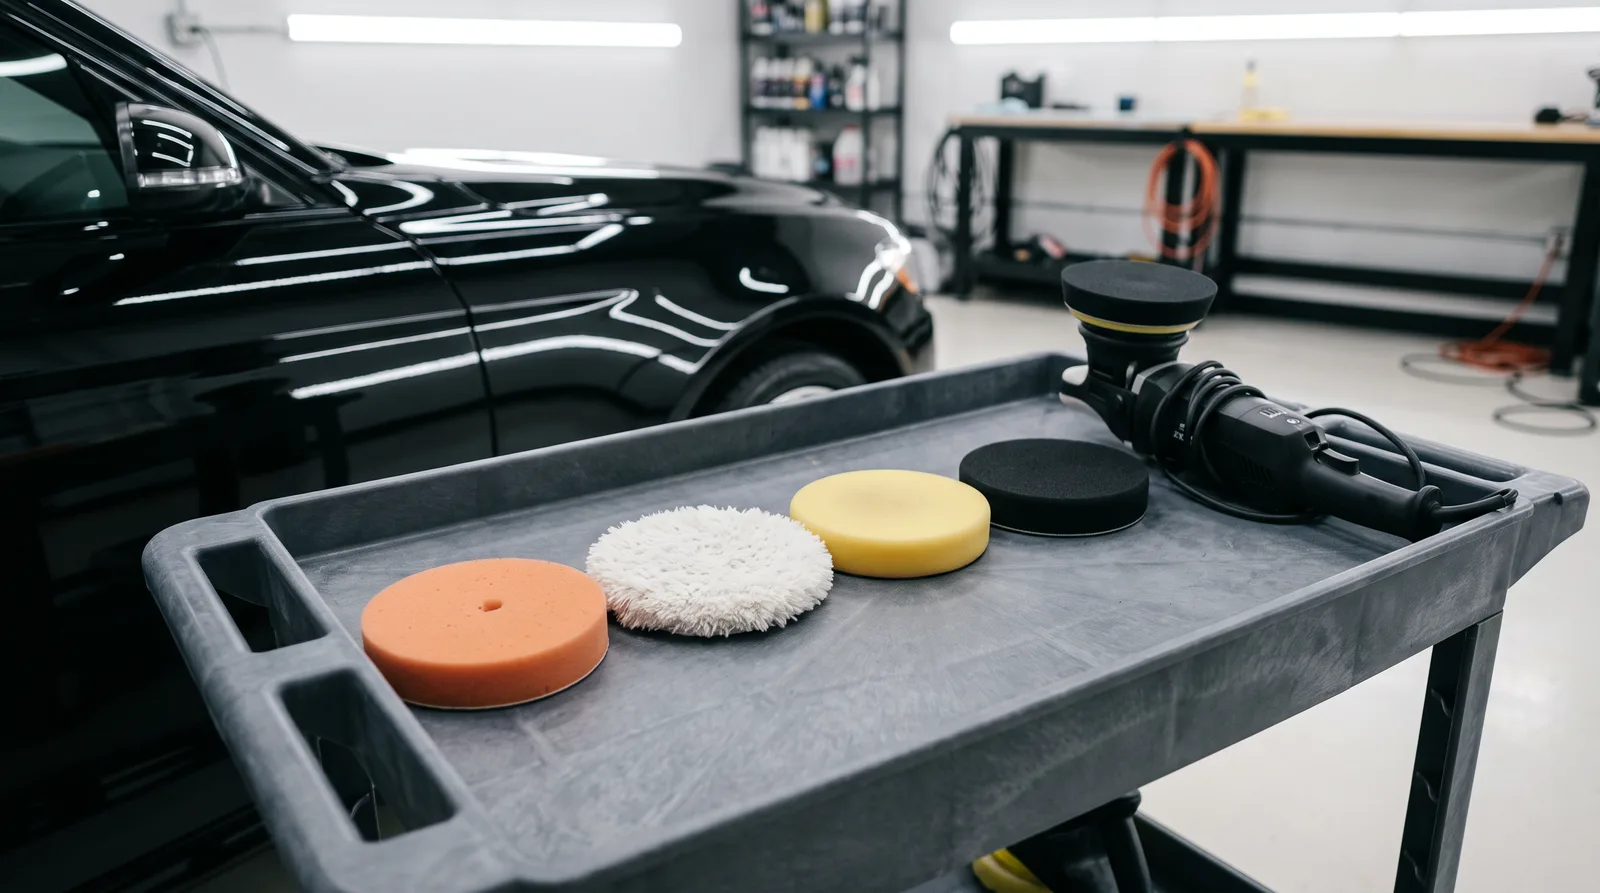
Pads also need to be cleaned often during the job. A pad loaded with spent compound and removed clear coat cuts unevenly and can scratch. Clean pads, and swapping pads often, are a quiet but real part of a good result.
Technique: speed, pressure, and passes
Even with the right machine and pad, technique decides the result. Machine speed, arm pressure, how slowly the machine moves across the panel, how many overlapping passes are made, and how long the polish is worked before it's wiped off all change how much correction you get. That's why we start every job with a test spot instead of a guess.
The test spot: how a detailer picks the right combination
Every car's paint behaves differently. Some clear coats are hard and resist cutting. Others are soft, correct easily, and haze easily. Even two cars of the same model can differ, and a repainted panel can behave nothing like the factory panel next to it.
So the process starts small. We tape off a section, usually on a flat panel like the hood or trunk, and start with the least aggressive combination we think might work. Then we check it under bright inspection lighting:
- Did it remove enough? If the swirls are still there, step up to a firmer pad or a more aggressive liquid.
- Did it finish well? If the defects are gone but the area looks hazy, add a polishing step or adjust the finishing combination.
- Is it worth going further? If the remaining marks are deep, we weigh the clear coat cost against the visual gain and tell you honestly.
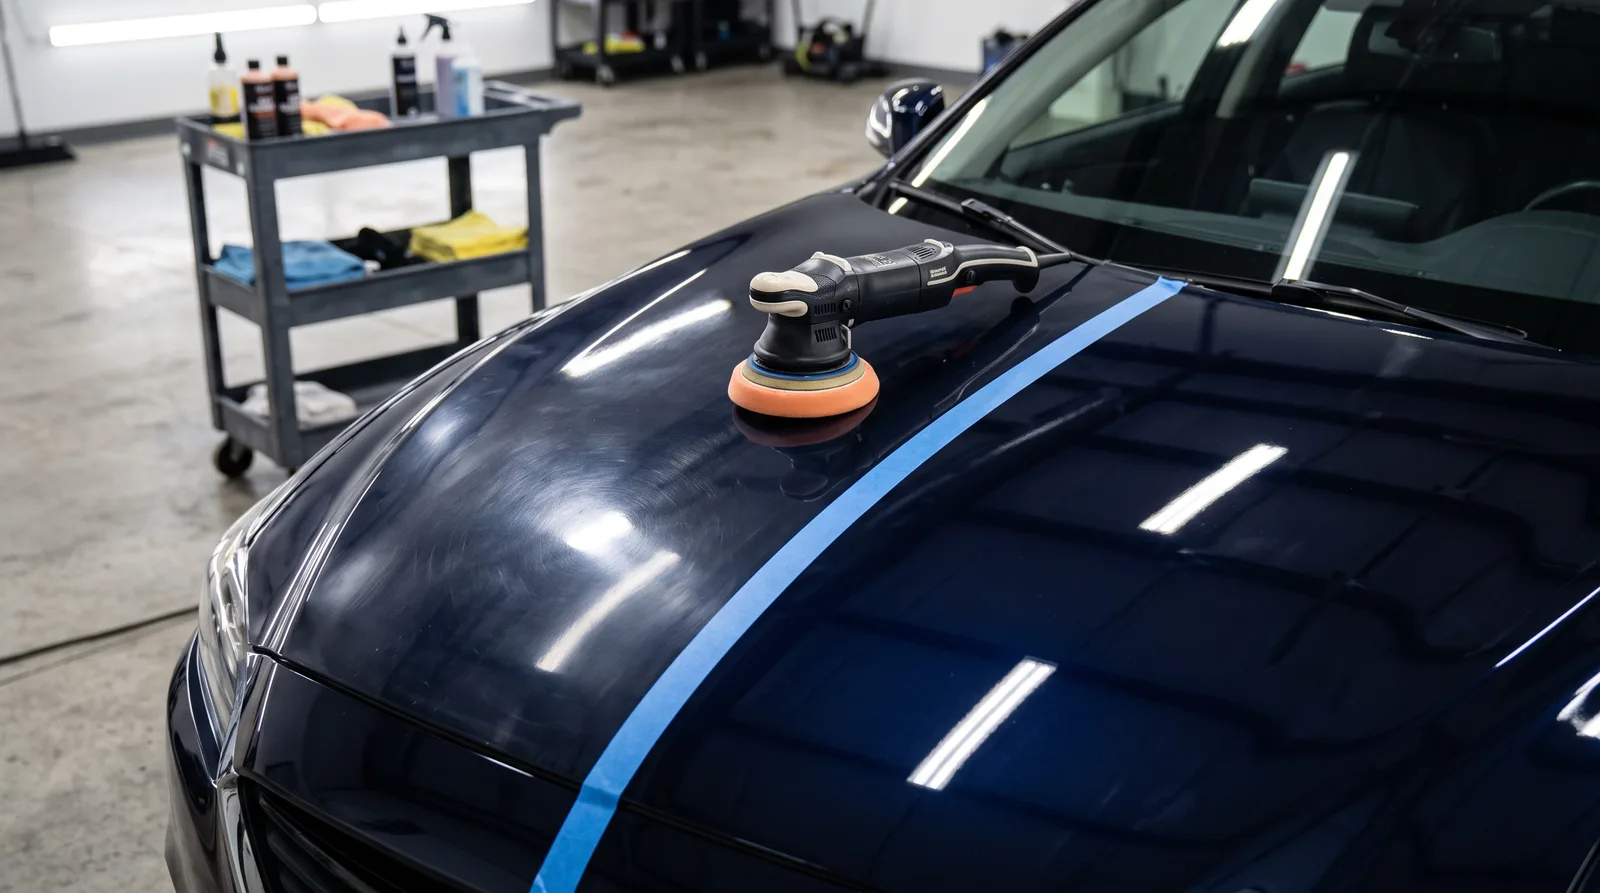
Once the test spot gives the result the customer wants, we apply that same process across the rest of the car, adjusting for thinner areas, edges, and any repainted panels.
Single-stage vs. multi-stage paint correction
This is where most of the confusion around paint correction comes from. "Stage" here means how many compound/polish steps the car gets, not how many times the machine touches it.
One-step correction (single-stage)
A one-step correction uses one polish and pad combination across the whole car. It's chosen to remove as much as possible while still finishing glossy. It typically removes a large share of light swirls and haze, and it brings back obvious gloss. It removes the least clear coat and takes the least time, which is why it's the right call for newer cars, lightly swirled cars, and most cars going under a ceramic coating.
Two-step correction
A two-step correction compounds first to remove heavier swirls and scratches, then polishes to remove the compound haze and restore gloss. It's the right fit for cars with moderate to heavy swirling, years of automatic car washes, or noticeable water spot etching. The result is a much higher level of defect removal than a one-step can reach.
Multi-stage correction
A multi-stage correction may involve a compounding step, a polishing step, and a finishing step, plus targeted spot work on deeper defects. It's for enthusiast cars, show cars, very dark paint, or cars where the owner wants as close to flawless as the clear coat safely allows. It takes the most time and removes the most clear coat, so measurements matter even more here.
Comparing correction levels
| Correction level | Steps | Best for | Typical result | Auburn-Opelika price range* |
|---|---|---|---|---|
| One-step | Polish only | Newer or lightly swirled paint; prep for ceramic coating | Big gloss gain, removes most light swirls and haze | About $250 to $450 |
| Two-step | Compound, then polish | Moderate to heavy swirls, years of car-wash damage | Much higher defect removal with a glossy finish | About $450 to $800 |
| Multi-stage | Compound, polish, finish, plus spot work | Dark paint, enthusiast and show cars | As close to flawless as the clear coat safely allows | About $800 to $1,500 or more |
*Ranges are typical for the area and depend on vehicle size, paint condition, paint hardness, and the result you want. Final pricing is quoted after an in-person inspection.
One thing we tell every customer: "100% correction" is rarely the right goal. On many cars, the last few percent of defects sit deep enough that removing them would use up a meaningful amount of clear coat. A strong two-step that removes the vast majority of defects and leaves plenty of clear coat for the future is usually a smarter result than chasing a single deep scratch.
What happens before the machine ever touches the paint
The polishing is the visible part, but the prep decides whether it works. Polishing over dirt or bonded contamination drags that debris across the paint and creates new scratches.
Wash and decontamination
- Thorough hand wash to remove loose dirt, pollen, and road film.
- Iron decontamination to dissolve embedded brake dust and rail dust particles.
- Tar and sap removal where needed, which is common in Lee County with all the pine trees.
- Clay treatment to pull out bonded contamination so the paint is perfectly smooth.
Inspection and taping
After decon, the car is dried and inspected under bright, color-accurate lighting. That's when the real condition of the paint shows. Then we tape off rubber seals, plastic trim, badges, and sharp body lines. Polish can stain textured trim, and edges carry less paint, so taping protects both.
Doing correction inside a controlled shop matters here, too. Dust, wind, direct sun, and heat all work against polishing. Hot panels make polishes dry out too quickly, and wind blows grit onto the pad. That's one reason paint correction at our Opelika location is always done indoors, under proper lighting, on cool paint.
After correction: why it has to come before ceramic coating
When the final polishing step is done, the paint still has polishing oils on it. Those oils can fill in fine marks and make the paint look better than it really is. So the next step is a panel wipe: a dedicated prep spray that removes the oils and shows the true finish. If anything was hidden, it shows up now and gets another pass.
This is also why paint correction must come before a ceramic coating, not after:
- A coating locks in what's under it. A ceramic coating bonds to the surface and magnifies its gloss. If the paint is swirled, you get glossy, protected swirls.
- A coating needs a bare, clean surface to bond to. Correction plus panel wipe gives it exactly that.
- Polishing a coated car means removing the coating. If you skip correction and want it later, the coating has to be polished off first.
That's why every ceramic coating we install starts with at least a one-step correction. You can see how the full sequence fits together in our ceramic coating process, step by step, and learn more about ceramic coating at My Awesome Detailer. If you'd rather protect against rock chips as well, corrected paint is also the ideal base for paint protection film.
Want to see what correction can do for your paint?
Bring your car to our shop at 2709 Frederick Road in Opelika. We'll inspect it under proper lighting and recommend the right level of correction.
Why Alabama paint needs correction more often
Paint in Auburn and Opelika lives a harder life than paint in a mild climate. A few local factors show up again and again when we inspect cars:
- Heat and UV. Long, hot summers bake horizontal panels like hoods, roofs, and trunks. UV and heat speed up oxidation and make hard water spots etch faster.
- Pollen season. Spring pollen coats every car in yellow dust. Wiping it off dry is one of the fastest ways to create swirls.
- Love bugs and bird droppings. Both are acidic and can etch clear coat if they sit in the sun.
- Red clay and construction dust. Fine grit in the wash water acts like sandpaper under a mitt.
- Automatic car washes. Convenient, but brush and cloth washes are a leading cause of the spiderweb swirls we correct every week.
The good news is that most of this damage stays in the clear coat, which means correction can usually remove it. The better news is that once it's corrected and protected, it's much easier to keep that way.
How to keep corrected paint from swirling again
Paint correction is permanent in the sense that removed defects don't come back. But new defects can be added the same way the old ones were. A few habits make the biggest difference:
- Protect it right away. A sealant, ceramic coating, or PPF adds a layer that takes the abuse instead of the clear coat.
- Use the two-bucket method or a rinse bucket with a grit guard so you aren't dragging dirt back across the paint.
- Use clean, soft microfiber for washing and drying, and wash those towels separately.
- Skip brush car washes. A touchless wash is a better backup if you can't hand wash.
- Don't wipe a dry, dusty car. Rinse first, especially during pollen season.
- Remove bird droppings and bug splatter quickly, before the sun bakes them in.
If you want a professional to handle the upkeep, our auto detailing services are built to keep corrected and coated paint looking its best.
Common paint correction myths
"Paint correction is just a fancy wax."
No. Wax sits on top of the paint and wears off. Correction removes a thin layer of clear coat to take the defects out. The result is permanent until new damage is introduced.
"It thins the paint, so it's bad for the car."
Correction does remove clear coat, but a careful job removes only a few microns, measured and planned around how much paint the car has. The risk comes from aggressive, unmeasured, or repeated polishing, not from correction itself.
"A buffer at the car wash does the same thing."
A quick machine buff with a filler-heavy product can make paint look better for a few weeks. It isn't the same as decontamination, test spots, staged correction, and a panel wipe to confirm the real result. A rushed buff with no finishing step is also a common source of holograms.
"It can fix any scratch."
Correction fixes defects in the clear coat. If a scratch has cut through to the color coat, primer, or metal, polishing can only soften how it looks. That needs touch-up or paint work.
The paint correction process at My Awesome Detailer
Here's what the process looks like from drop-off to pick-up at our Opelika shop:
- Inspection and goals. We look at the paint under proper lighting with you and talk about the result you want.
- Measurement. Paint depth readings around the car flag thin or repainted panels.
- Wash and decon. Hand wash, iron removal, tar removal as needed, and clay.
- Taping and test spot. Trim and edges are taped, and a test spot dials in the machine, pad, and polish.
- Correction. Panel by panel, one-step, two-step, or multi-stage depending on the level you chose.
- Panel wipe and inspection. Oils are removed so we can see the true finish and touch up anything we missed.
- Protection. Sealant, ceramic coating, or PPF, based on what you picked.
Our installers hold Owner's Pride Select status, a designation held by roughly the top 40 shops in the U.S., and we're rated 4.9 stars from more than 200 reviews. You can read more about our team, and we'll always give you a price range and timeline before any work begins.
Ready to bring the gloss back?
Paint correction is done inside our shop in Opelika, serving Auburn, Opelika, and Lee County. Tell us about your car and we'll set up an inspection.
Paint correction isn't magic, and it isn't a wax. It's a measured, mechanical process: compound to remove defects, polish to remove the compound's marks, finish to bring out the last bit of clarity, and protect the result so it lasts. When it's done carefully, with the right machine, the right pad, and as little clear coat removed as possible, the gloss your car had on day one is usually still there, just waiting under the swirls.